Learning how to draw a face is an exciting endeavor for beginners interested in portrait drawing. With step-by-step guidance, individuals can develop their skills and create impressive artwork. This article provides a comprehensive tutorial that covers the fundamentals of drawing a face, including facial proportions and placement of features.
For those starting out in portrait drawing, it’s essential to understand the basic techniques and concepts. By following a structured approach, beginners can gain confidence and gradually improve their artistic abilities. The step-by-step instructions provided in this article will enable aspiring artists to create realistic and lifelike faces.
How to Draw a Face? – Step By Step
When it comes to drawing a face from the front, understanding the placement of facial features and their proportions is essential. This step-by-step guide will help beginners learn how to accurately sketch a face with realistic proportions.
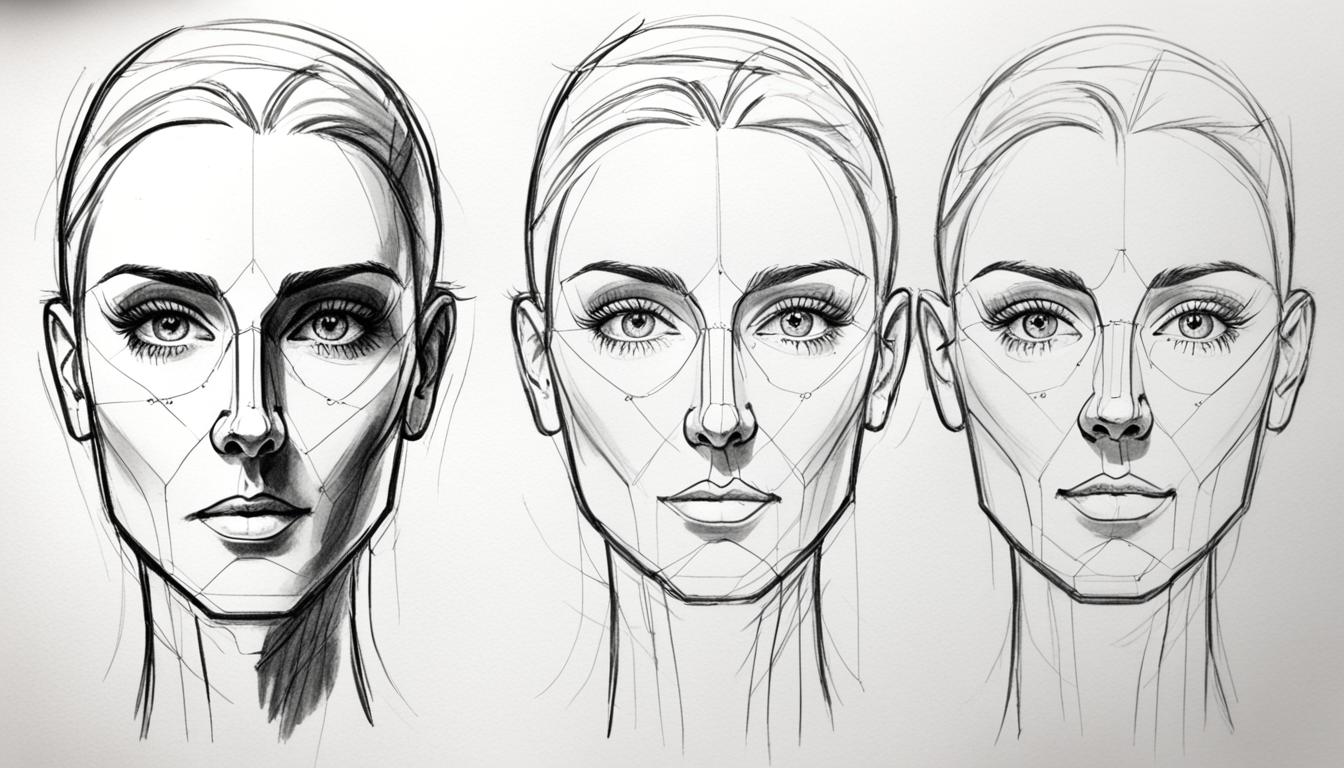
Start by drawing a circle, which will serve as the basis for the head. Then, add intersecting lines to determine the position of the facial features. The square within the circle will help establish the edges of the face.
Next, measure the distance from the center line to the bottom line to accurately place the chin. This ensures that the proportions of the face are correct. The eyes should be located on a line in the center of the head, and their width can be determined by measuring the head from ear to ear.
The nose is positioned on the bottom line of the square, with a width generally as wide as the inside corners of the eyes. The mouth, on the other hand, should be positioned slightly higher than halfway between the bottom of the nose and the chin.
The ears should align with the brow line and the nose line, extending slightly outward from the head. Lastly, the hairline is located on the top edge of the square, framing the face.

By following these step-by-step instructions, beginners can learn how to draw a face from the front with accurate proportions, ultimately creating more realistic and lifelike sketches.
Drawing a Face from the Side (Profile)
Drawing a face from the side is a fundamental skill in portrait drawing. It follows a similar process to drawing a face from the front, but with a few key differences. By following these step-by-step instructions, beginners can master the art of drawing a face from the side and create a three-dimensional representation.
Sketching the Facial Proportions
Start by sketching a circle to represent the head. Then, draw a square within the circle, aligning the bottom of the square with the bottom of the circle. These shapes will serve as the foundation for the face.
Next, draw intersecting lines to establish the placement of the facial features. Extend a vertical line downwards from the center of the circle to represent the nose. The eyes will be positioned along this line, with the eyebrows above and the mouth below. These guidelines will help you maintain the correct proportions.
Now, it’s time to add the contours of the facial features. Draw the eye on the side of the circle, aligning it with the guidelines. The nose should follow the same alignment, extending from the vertical line. Lastly, draw a curved line to represent the mouth, ensuring it is proportionate to the other features.

Adding Depth with Shading
To create a sense of form and depth, shading is essential. Start by identifying the light source in your drawing. This will determine where the highlights and shadows should fall.
Using light and dark shading techniques, begin by adding shadows to the areas of the face that are away from the light source. Pay attention to the contours of the face and use shading to give the face a three-dimensional appearance. Gradually build up the layers of shading, using a soft pencil or charcoal. The forehead, cheeks, and chin are usually areas that have more prominent shadows.
Refine the shading as needed, ensuring a smooth transition between light and shadow. Pay attention to the specific features, such as the nose, eyes, and mouth, to add depth and dimension.
Remember, practice makes perfect. The more you practice drawing faces from the side, the better you’ll become at capturing the unique proportions and characteristics of each individual face.
Adding Details and Shading
Now that you have established the basic structure of the face, it’s time to add those extra details that will bring your drawing to life. By paying attention to the small nuances of the face, you can enhance the realism and create a truly captivating piece of art.
Here are some essential details you should focus on:
- Eyebrows: Use short, light strokes to draw the eyebrows. Pay attention to their shape and thickness, as they can dramatically influence the overall expression of the face.
- Eyelids and Lashes: Sketch the upper and lower eyelids, emphasizing the curvature and thickness. Add lashes to the upper lid for a more realistic look.
- Contour Lines of the Lips: Define the outline of the lips with precise, confident strokes. Consider the shape and size of the lips, and notice any subtle curves or asymmetry.
- Refining the Ear: Pay attention to the shape, size, and placement of the ear. Observe the details of the earlobe, the helix, and the tragus. Use reference images to guide you in capturing the intricate structure.
- Drawing Hair: Experiment with different hair styles and textures to suit your desired look. Observe the direction of the strands and use light, flowing strokes to add depth and movement to the hair.
Once you have added these details, it’s time to introduce shading to your drawing. Shading helps to create depth and dimension, making your portrait appear three-dimensional and realistic. Here are some shading techniques to consider:
- Crosshatching: Use intersecting lines to build up layers of shading. Vary the density and direction of the lines to create different textures and values.
- Blending with a Blending Stump: Utilize a blending stump or tortillon to smudge and blend the graphite or charcoal. This creates a smooth and seamless transition between light and shadow.
By practicing these techniques, beginners can elevate their portrait drawing skills and create more realistic and lifelike faces. Remember, practice is key, so keep experimenting, observing, and refining your techniques to achieve stunning results.

Shading Techniques
| Technique | Description |
|---|---|
| Crosshatching | Using intersecting lines to build up layers of shading, creating different textures and values. |
| Blending with a Blending Stump | Using a blending stump or tortillon to smudge and blend the graphite or charcoal, creating a seamless transition between light and shadow. |
Conclusion
Learning how to draw a face can be a rewarding and enjoyable experience. By following step-by-step instructions and practicing regularly, beginners can develop their skills in drawing faces. Whether drawing from the front or the side, understanding facial proportions and placement of features is crucial to creating realistic and lifelike portraits.
Adding details and using shading techniques can further enhance the depth and realism of the drawings. By incorporating different styles, such as drawing a face in an anime or cartoonish way, artists can explore their creativity and create unique and expressive portraits. It is also important to consider the target audience, including girls, boys, and kids, when learning how to draw a face to cater to their interests and preferences.
Additionally, for those who are looking to draw a face based on a photograph, sketching techniques can be employed to accurately capture the likeness and features of the subject. Using guidelines and measurements, beginners can overcome the challenges of drawing a face from a photo and achieve a more accurate representation.
With perseverance and practice, anyone, regardless of their artistic background, can learn how to draw a face and create beautiful and expressive portraits. By following a comprehensive drawing faces guide and incorporating their own style and techniques, artists can continue to develop their skills and create stunning works of art.
Related Articles: