Building a patio has become a popular DIY project for homeowners looking to elevate their outdoor living spaces. With the right planning and materials, you can create a beautiful patio that will enhance your garden and provide a space for relaxation and entertainment. In this guide, we will take you through the step-by-step process of how to lay a patio.
Are you tired of your uninspiring backyard? Do you dream of creating an outdoor oasis where you can unwind and host memorable gatherings? Look no further than a patio! Not only does a patio add value to your property, but it also provides an extension of your living space, allowing you to enjoy the beauty of the outdoors. Whether you have a sprawling garden or a cozy courtyard, a well-designed patio can transform your outdoor area into a welcoming retreat.
Before diving into the exciting world of patio design ideas and outdoor flooring options, it’s essential to understand the process of how to lay a patio. By following our comprehensive step-by-step guide, you can confidently embark on this DIY landscaping project and make your patio dreams a reality.
How to Lay a Patio?
Planning and Designing Your Patio
When it comes to laying a patio, the first step is proper planning and design. This crucial stage sets the foundation for the entire project, ensuring that your patio is not only functional but also visually appealing. Here are some essential considerations to keep in mind:
Choosing the Right Size and Shape
Before you grab your tools, take a moment to envision your ideal patio. Consider the available space and how you plan to use it. Do you envision a cozy corner for intimate gatherings, or a spacious area for hosting larger gatherings? Think about your lifestyle and preferences to determine the size and shape that best suits your needs.
Remember to factor in factors like sunlight and proximity to your house. Ensure that your patio receives the optimal amount of sunlight throughout the day while providing convenient access from your home.
Planning for Drainage
Proper drainage is crucial to prevent water accumulation and potential damage to your patio. Consider the natural slope of your yard and plan the patio layout accordingly. Ensure that the patio surface slopes away from your house to redirect water flow. You may also want to incorporate features like gutters or French drains to further enhance drainage efficiency.
Patio Design Ideas
Get creative and bring your patio design ideas to life! Whether you prefer a modern and sleek look or a rustic and charming ambiance, there are endless possibilities to explore. Consider incorporating features such as built-in seating areas, fire pits, or outdoor kitchens to elevate your patio’s functionality and visual appeal.

Remember to sketch out your design and take accurate measurements to determine the quantity of materials needed. This step will help streamline the construction process and ensure a seamless installation.
The planning and design stage of your patio project is crucial. It sets the foundation for a successful and enjoyable outdoor space. Take the time to consider the size, shape, drainage, and design ideas that align with your vision. With proper planning, you’ll be well-prepared to transform your outdoor living area into a stunning patio.
Preparing the Area for Your Patio
Before embarking on the process of laying a patio, it is crucial to properly prepare the designated area. This involves several key steps to ensure a solid foundation and a visually appealing end result.
Marking and Excavating the Patio Area
The first step in preparing your patio area is to mark out the space where it will be located. Use a tape measure, stakes, and string to mark the boundaries of your patio. This will help you visualize the size and shape of the area.
Once the area is marked, the next step is excavation. Clear the area of any vegetation, debris, or existing structures. Excavate the area to a depth of around 8 to 10 inches, ensuring the ground is level and compacted. This will provide a stable base for your patio.
DIY vs Hiring a Professional
At this stage, you will need to decide whether to tackle the patio installation yourself or hire a professional. DIY patio installation can be a rewarding project, allowing you to save costs and have a sense of accomplishment. However, it requires careful planning, time, and effort. On the other hand, hiring a professional can ensure a seamless installation and alleviate any potential challenges, particularly for complex designs or larger areas.
Materials and Tools
Gather all the necessary materials and tools before starting the project. This may include paving slabs or pavers, gravel for the base, sharp sand for the mortar mix, landscape fabric for weed control, and edging materials. Additionally, have a tape measure, level, mallet, and possibly a compactor to ensure accuracy and stability throughout the process.
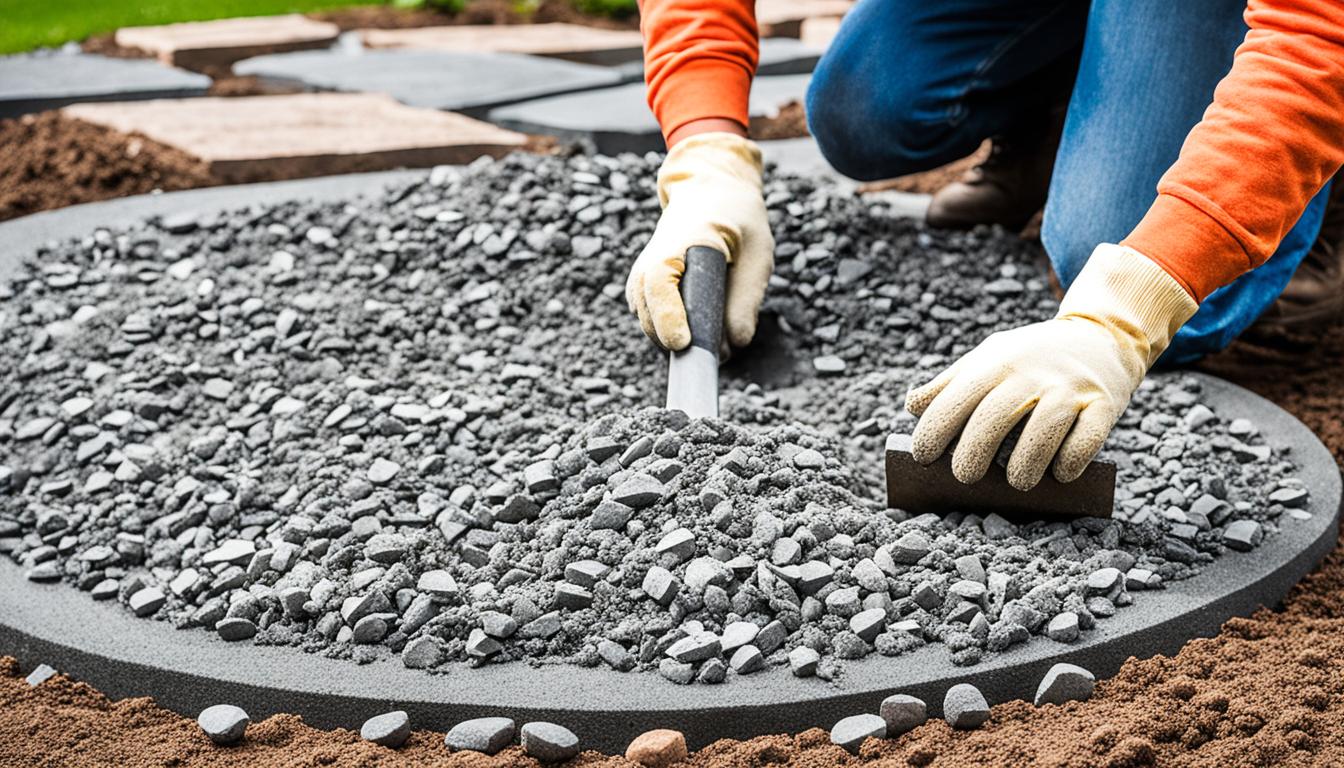
Gravel Base for the Patio
Creating a solid base is essential for the longevity and stability of your patio. After excavation, spread a layer of gravel evenly across the area. This will provide a stable foundation and facilitate proper drainage. Compact the gravel using a compactor to ensure it is firmly packed.
Sharp Sand for Mortar Mix
The mortar mix is what holds the paving slabs in place, providing strength and stability. Mix sharp sand with cement according to the manufacturer’s instructions. The ratio typically ranges from 4 parts sand to 1 part cement. Use a wheelbarrow or mixing tub to achieve a consistent and workable mortar mix.

By following these essential steps, you will ensure that your patio area is properly prepared for the next stage of installation. Building a solid foundation is crucial for the long-term durability and aesthetics of your patio project.
Laying the Patio Slabs
Now that the area is prepared, it’s time to start laying the patio slabs. Follow these steps to ensure a successful installation:
- Mix and Lay Mortar: Start by mixing the mortar according to the instructions provided. It’s important to achieve the right consistency for proper adhesion. Spread a layer of mortar on the prepared area using a trowel.
- Lay the First Slab: Begin laying the patio slabs by starting at the highest point of the patio. Place the first slab on the mortar bed, ensuring that it is level and properly aligned with the rest of the area. Use a rubber mallet or a wooden block to gently tap the slab into place.
- Continue Laying Slabs: Lay the remaining slabs, leaving a small gap between each one to allow for expansion. Make sure each slab is level and aligned with the previous ones. Use a spirit level to check the alignment and adjust as needed.
- Cut Patio Materials: If necessary, cut the patio materials to fit the edges of the designated area. Use a suitable cutting tool like a diamond blade saw or a chisel and hammer to carefully cut the slabs to the desired size and shape.
- Level and Adjust: Once all the slabs are in place, take the time to level and adjust the patio as a whole. Use a straight edge or a level to ensure a smooth and even surface. Make any necessary adjustments by adding or removing mortar underneath the slabs.
By following these steps, you can achieve a professional-looking patio with properly laid slabs. Take your time and pay attention to detail to ensure a durable and visually appealing result.
Now that the patio slabs are in place, it’s time to let the mortar cure. Section 5 will guide you through the process of allowing the patio to cure and provide alternatives to using cement for laying a patio.
Allowing the Patio to Cure
After the patio slabs are in place, it’s important to allow the patio to cure. This means giving the mortar time to dry and harden, ensuring that the slabs are securely held in place. The curing time can vary depending on the type of materials used, but it typically takes around 48 hours.
During this time, it’s important to protect the patio from bad weather by covering it with a tarpaulin if necessary. This will prevent rain or excessive moisture from compromising the curing process and potentially affecting the stability of the patio.
If you prefer to lay a patio without cement, there are alternative methods available. For beginners or those looking for a simpler approach, laying a patio on sand can be a suitable option. This method involves using a layer of sand as a base for the patio slabs, allowing for easier installation and adjustment.
If you have an existing concrete surface, you can also lay a patio on concrete. This entails laying the slabs directly on top of the concrete, providing a solid and durable foundation for your patio. It’s important to ensure that the concrete surface is clean, level, and in good condition before proceeding with this method.
By allowing the patio to cure properly and exploring different methods of patio installation, you can successfully create a beautiful outdoor space that enhances your home. Whether you choose to use cement, sand, or concrete, following the appropriate techniques and materials for a patio installation will ensure a long-lasting and visually appealing result.
Pros and Cons of Different Patio Installation Methods
| Patio Installation Method | Pros | Cons |
|---|---|---|
| Using Cement | Strong and durable | Requires more complex installation |
| Laying Patio on Sand | Easier for beginners | May require more maintenance |
| Laying Patio on Concrete | Stable and solid foundation | Requires existing concrete surface |

Adding Finishing Touches to Your Patio
Once the patio has cured, it’s time to add the final touches that will complete the look of your outdoor space. This is where you can showcase your personal style and preferences. Here are some key aspects to consider when adding those finishing touches:
Patio Edging Options
Patio edging serves as a boundary, giving your patio a clean and finished appearance. There are various options available, including:
- Brick or stone: This classic choice adds a touch of elegance and durability to your patio.
- Wood: If you prefer a more natural and rustic look, wood edging can create a warm and inviting atmosphere.
- Metal: Sleek and modern, metal edging can add a contemporary flair to your patio design.
Consider the overall style and aesthetic of your patio when selecting the perfect edging option.
Outdoor Flooring Guide
The choice of outdoor flooring material is crucial for both the look and functionality of your patio. Here are some popular options to consider:
- Stone: Natural stone, such as granite or limestone, offers timeless beauty and durability for your patio surface.
- Pavers: Available in a range of materials, shapes, and colors, pavers allow for creative patterns and designs.
- Concrete: A versatile and cost-effective option, concrete can be textured, stained, or stamped to mimic the look of other materials.
Explore the different materials and their maintenance requirements to find the best fit for your patio.
Patio Construction Tips
To ensure the longevity and durability of your patio, here are some additional construction tips to keep in mind:
- Proper drainage: Ensure that the patio slopes away from your house to prevent water accumulation.
- Sealing: Consider applying a sealant to protect your patio from stains, weather damage, and color fading.
- Maintenance: Regularly clean and inspect your patio for any repairs or necessary touch-ups.
Following these tips will help maintain the quality and appearance of your patio for years to come.
Now that you have added the finishing touches, step back and admire your transformed outdoor living space. Your patio is ready to provide a beautiful and functional area for relaxation, entertainment, and making memories with family and friends.

| Patio Edging Options | Pros | Cons |
|---|---|---|
| Brick or stone | Classic and durable | May require professional installation |
| Wood | Natural and rustic look | Requires regular maintenance and may be prone to rot |
| Metal | Sleek and modern | May get hot under direct sunlight |
Conclusion
Transform your outdoor living space with a beautifully laid patio. By following our step-by-step guide and incorporating our patio construction tips and design ideas, you can create a functional and visually appealing extension of your home. With careful planning, proper preparation, and attention to detail during the installation process, you’ll be able to enjoy a durable and stunning patio for years to come.
Remember to consider the size and shape of your patio, the materials and tools needed, and the importance of proper leveling and alignment. Allow the patio to cure for optimal strength, taking into account alternative options if cement is not desired. Once your patio is complete, explore different finishing touches, such as patio edging options and various outdoor flooring materials, to truly personalize your outdoor space.
Don’t delay any longer, start planning your patio project today and make the most of your outdoor space with our expert guidance. Whether you’re a seasoned DIY enthusiast or a beginner, our comprehensive step-by-step patio installation guide will equip you with the knowledge and confidence to achieve your patio construction goals.
FAQs
How do you lay a patio for beginners?
For beginners, laying a patio involves steps like planning the layout, preparing the area, leveling the ground, laying a base material (like sand or gravel), placing the pavers or slabs, ensuring proper spacing, and finishing with jointing sand or mortar.
Can you lay a patio directly on soil?
It is not recommended to lay a patio directly on soil as soil can shift, leading to unevenness and potential damage to the patio over time. A stable base of sand, gravel, or concrete is suggested for better durability.
What base should a patio be laid on?
A patio should ideally be laid on a solid base that offers good drainage and supports the weight of the patio materials. Common base options include compacted gravel, crushed stone, sand, or concrete.
Is it better to lay a patio on sand or cement?
The choice between laying a patio on sand or cement depends on the patio design, location, and personal preferences. Sand is commonly used for lighter applications and allows for flexibility, while cement provides a more stable base but is less forgiving during installation.
Can I lay slabs on a dry mix of sand and cement?
Yes, you can lay slabs on a dry mix of sand and cement known as a dry sand-cement mix. This mixture is often used as a bedding layer for setting slabs in place securely.
Should I put sand or gravel under my patio?
Both sand and gravel are suitable base materials for a patio depending on factors like drainage requirements, ground stability, patio design, and personal preference. Gravel provides better drainage, while sand offers a smoother base for laying patio materials.