Welcome to the fascinating world of paper airplane making! In this comprehensive guide, we will take you through the process of creating a paper airplane that will soar through the air with ease and grace. Whether you’re a craft enthusiast or want to engage your kids in a fun activity, making a paper airplane is an excellent choice.
With our step-by-step instructions and simple materials, you’ll be able to create a paper airplane that will impress everyone who sees it in flight. From the basic folding techniques to troubleshooting tips, we have you covered every step of the way to ensure your paper airplane flies far and straight.
But first, let’s introduce ourselves to the art of paper plane making. In the upcoming sections, we’ll explore various folding techniques, variations you can try, troubleshooting tips, choosing the right paper, and more. So, let’s gather our materials, get ready to fold, and create the paper airplane of your dreams!
Folding Techniques for a Basic Paper Airplane
Creating a basic paper airplane is a delightful craft that anyone can master. In this section, we will explore the essential folding techniques to help you make a paper airplane that soars through the sky with elegance. Let’s dive in!
To begin, you will need a flat sheet of paper that’s easy to fold. Follow these simple steps:
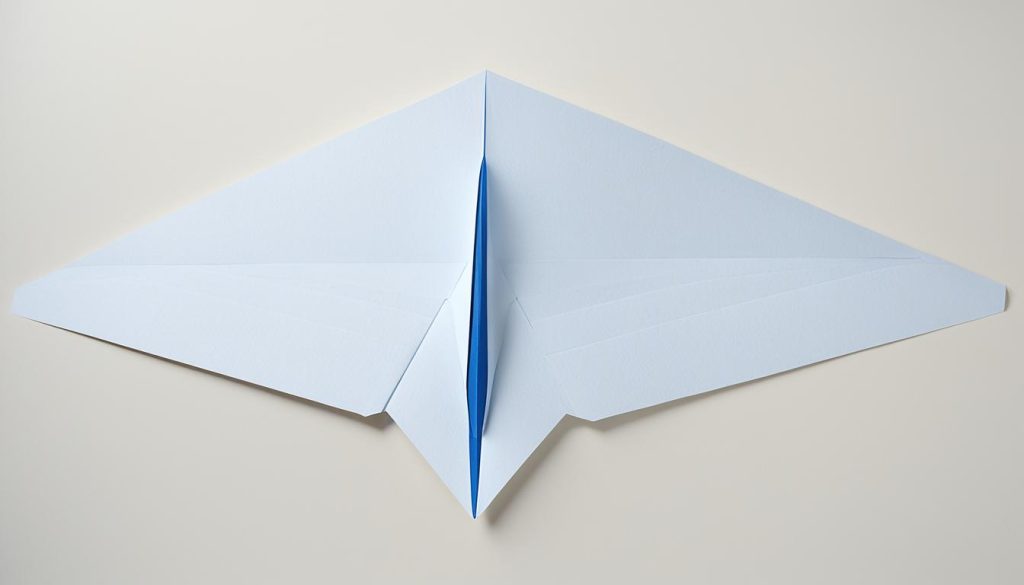
- Fold the paper in half lengthwise to create a center crease.
- Next, fold the top corners towards the center crease to form a triangle.
- Fold the angled top edges towards the crease once more, creating a long triangle shape.
- Finally, fold the paper along the centerline and crease the angled sides towards the center fold to create the wings.
It’s important to ensure that the wings are symmetrical for optimal flight performance. Take your time to crease the folds firmly, as it helps maintain the shape of the paper airplane.
Here is an illustration of the folding techniques:

Maintaining Symmetry
When folding the paper airplane, pay close attention to the symmetry of the wings. Symmetrical wings help the paper airplane maintain balance during flight, resulting in smoother glides through the air.
Pro Tip: If you find it challenging to maintain symmetry, you can try folding one wing first, then unfolding it and using it as a template to fold the other wing. This method ensures consistency in wing shapes.
Experimenting with Paper Types
Different types of paper can affect the flight characteristics of your paper airplane. While a standard sheet of letter paper can work well, you can also experiment with various paper weights to achieve different results. Lighter paper may allow for longer flights, while sturdier paper can provide stability and durability.
| Paper Type | Flight Characteristics |
|---|---|
| Standard Letter Paper | Well-balanced flight and versatility |
| Origami Paper | Lightweight for longer flights |
| Cardstock | Sturdiness and stability |
Remember, the paper you choose for your paper airplane can impact its performance, so feel free to experiment and find the best paper for your desired results.
Now that you’ve familiarized yourself with the basic folding techniques and the importance of wing symmetry, it’s time to move on to the next section, where we’ll explore variations in paper airplane design. Get ready to take your paper-folding skills to the next level!
Variation: Making a Blunt-Nosed Paper Airplane
If you want to try a variation on the basic paper airplane design, you can make a blunt-nosed paper airplane. This modified design offers an exciting twist and can enhance the flight performance of your paper airplane. To create a blunt-nosed paper airplane, you will need to utilize different folding techniques compared to the traditional design.
Folding Techniques
To achieve a blunt nose, simply follow these steps:
- Start with a flat sheet of paper and fold it in half lengthwise.
- Next, leave some space on either side of the center crease when folding the corners. This will create a rounded nose instead of a pointed one.
- Then, fold the top corners towards the centre crease to form a triangle.
- Fold the angled top edges towards the crease again to create a long triangle.
- Finally, fold the paper along the centerline and crease the angled sides towards the centre fold to create the wings.
This modified design, with a rounded nose, is known as a blunt-nosed paper airplane. By changing the nose shape from pointed to blunt, the airplane becomes more streamlined, allowing it to fly further and more efficiently through the air.
| Features of a Blunt-Nosed Paper Airplane | Advantages |
|---|---|
| Sleek and aerodynamic design | Enhanced flight performance |
| Rounded nose | Improved stability in flight |
| Modified folding techniques | Creative and unique paper airplane design |
| Easy to make | Accessible for all skill levels |
So, if you’re looking to explore variations and experiment with different paper airplane designs, the blunt-nosed paper airplane is a fantastic option. It offers a modified design and exciting folding techniques that can result in improved flight performance and a visually appealing aircraft.

Try making a blunt-nosed paper airplane today and see how this modified design takes your paper aircraft to new heights!
Troubleshooting and Adjustments
Sometimes, your paper airplane may not fly as expected. When troubleshooting your paper airplane, there are a few adjustments you can make to ensure a smooth flight and prevent any nosedives.
If your paper airplane spirals out of control, the first thing to check is the wing folds. Make sure they are flat and even, as any unevenness can affect the flight path. Adjust the wing height if necessary, ensuring that both wings are at the same level.
To prevent nosedives, you can make a simple adjustment to the back edges of the wings. Bend them slightly upward to create a slight upward curve. This adjustment will help the paper airplane maintain a straighter flight and prevent it from diving towards the ground.
On the other hand, if your paper airplane tends to arc upwards and drop quickly, you can bend the back of the wings downwards slightly. This adjustment will create more lift and help maintain the loft of the paper airplane.
By troubleshooting and making these adjustments, you can improve the flight performance of your paper airplane and ensure it flies straight and true.
Choosing the Right Paper
When it comes to making a paper airplane that soars through the air, choosing the right paper is crucial. The weight, size, and foldability of the paper can greatly impact the performance of your creation. Let’s explore the key factors to consider when selecting the perfect paper for your paper airplane.
Weight Matters
Paper weight plays a significant role in the flight dynamics of a paper airplane. A medium-weight paper, such as letter paper or stationery, is ideal. These papers strike a balance between being easy to fold and offering enough sturdiness to maintain the shape of the airplane during flight. Papers that are too light might make the airplane flimsy and prone to crumpling, while papers that are too heavy could hinder the plane’s ability to glide smoothly through the air.
Size for Consistency
Consistency is key when it comes to folding your paper airplane. Using standard-size paper, such as 8.5″x11″ (A4), ensures that you have a uniform starting point for every flight. This helps maintain consistency in the folding process and allows you to fine-tune your techniques for optimal flight performance.
Foldability for Precision
The foldability of the paper is another important aspect to consider. Look for papers that can hold creases well and are easy to manipulate. Avoid papers that are too stiff or slippery, as they can make folding more challenging and compromise the structural integrity of your airplane.
Now that you have a better understanding of the paper characteristics to look for, it’s time to put your knowledge into action. Experiment with different papers to find the perfect balance between weight, size, and foldability for your paper airplane creations.
| Paper Type | Weight | Size | Foldability |
|---|---|---|---|
| Letter Paper | Medium | 8.5″x11″ (A4) | Good |
| Stationery | Medium | 8.5″x11″ (A4) | Excellent |
| Construction Paper | Heavy | 9″x12″ | Fair |
| Origami Paper | Light | 6″x6″ | Very good |

Tips for Successful Paper Airplane Flight
When flying your paper airplane, keep a few tips in mind to ensure a successful flight. These tips will help you maximize the distance and stability of your paper airplane:
1. Softly Throw the Plane
When launching your paper airplane, avoid throwing it too hard, as this can cause it to nosedive. Instead, focus on a gentle and smooth release. The force with which you throw the plane is more important than the speed.
2. Check Wing Balance
Before each flight, make sure that the wings of your paper airplane are lopsided, meaning one wing is slightly higher than the other. This imbalance helps create stability and allows the airplane to fly straighter.
3. Avoid Throwing Too Hard
Throwing the paper airplane with excessive force can cause the nose to rise, creating an unwanted ascent. Aim for a controlled, moderate throw to maintain a level flight path.
4. Find an Open Area
When testing and flying your paper airplane, choose an open area with plenty of space. This will minimize the risk of the plane colliding with obstacles and allow it to fly freely. An outdoor park or large indoor space can be ideal.
| Throwing Technique | Result |
|---|---|
| Soft, gentle throw | Smooth flight with moderate distance |
| Imbalanced wing positions | Straighter flight trajectory |
| Moderate throw | Maintained level flight without excessive ascent |
| Open area | Unobstructed flight path for maximum distance |
By following these tips, you can improve the performance and flight capabilities of your paper airplane. Remember to experiment with different folding techniques, adjust wing angles, and consider wind conditions for optimal results.

Conclusion
Making a paper airplane is a fun and rewarding activity that anyone can enjoy. By following the right folding techniques, making necessary adjustments, and choosing the appropriate paper, you can create a paper airplane that flies smoothly and impresses others. With practice and experimentation, you can explore different designs and find the perfect paper airplane that suits your preferences.
Whether you are a beginner or an experienced paper airplane crafter, the key to success lies in mastering the art of folding. Understanding the fundamental techniques and variations allows you to customize your paper airplane’s design and optimize its flight performance. Embrace the challenge of troubleshooting and making adjustments to improve your paper airplane’s flight path.
Remember that paper airplane crafting is not only a hobby but also a great way to exercise your creativity and engage in hands-on learning. As you embark on this journey, enjoy the process and embrace the joy of creating something from a simple sheet of paper. So grab your paper, fold, throw, and let your imagination soar!

